How Do I Create a Job Template?
Last updated: October 1, 2026
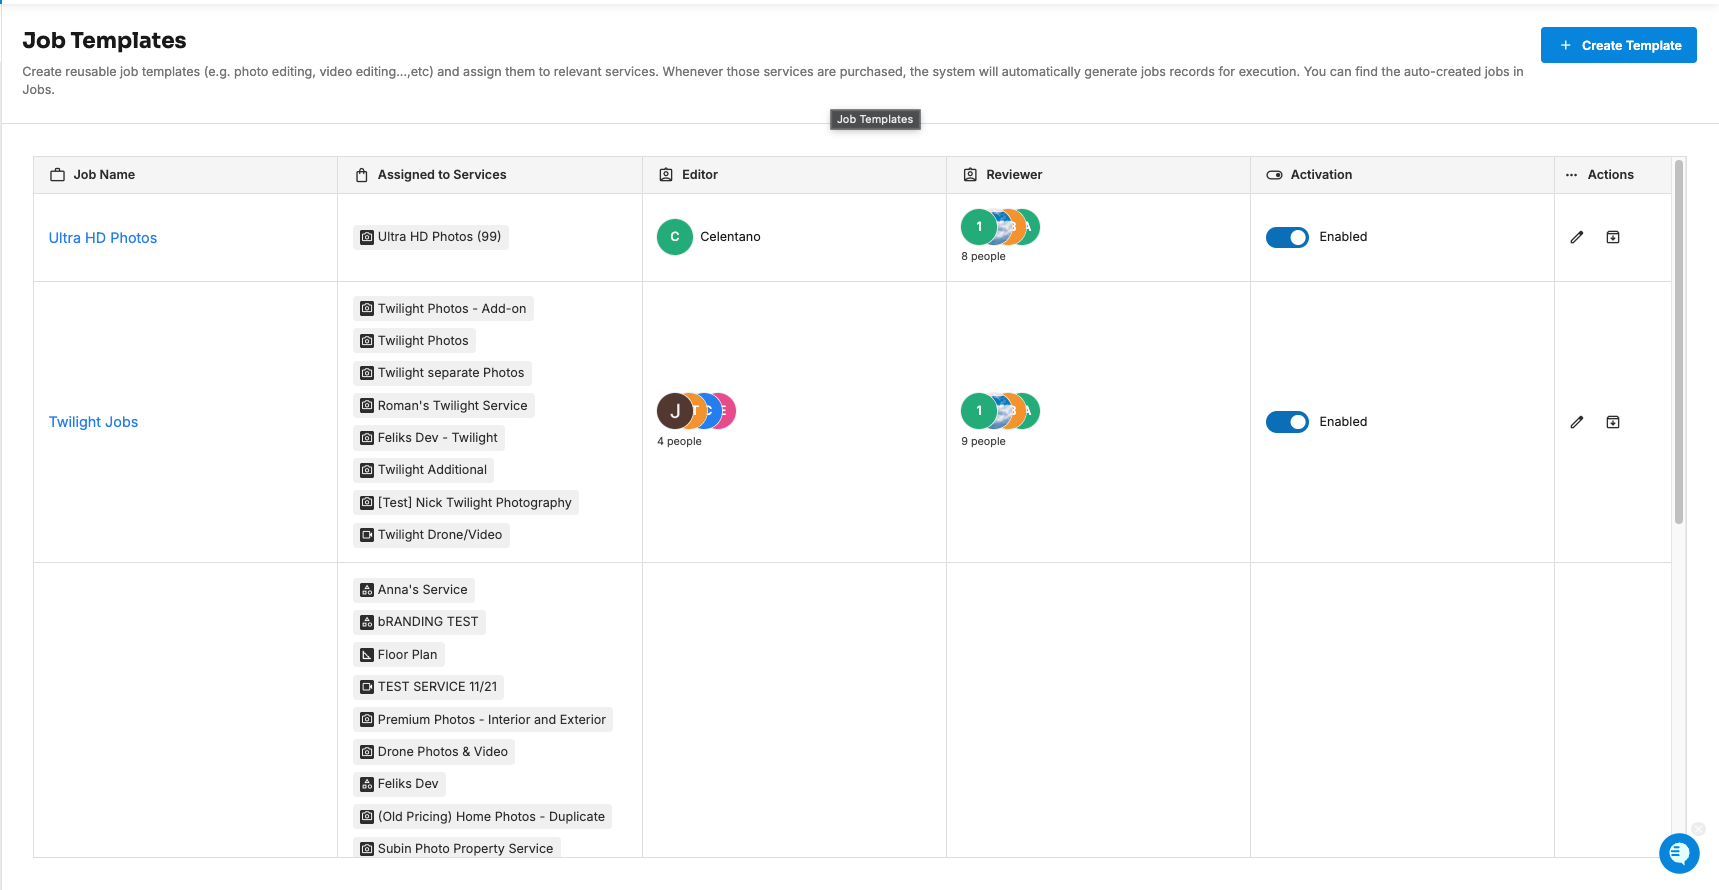
A job template tells Tonomo which job to create, for which services, when, who works on it, who reviews it, and when it's due. You create templates in Jobs Management > Jobs Templates by clicking Create Template. Once a template is enabled, Tonomo creates a job from it automatically whenever an order includes one of its services. For example, a Video Editing template linked to your video services creates a video editing job for every order with video.
At a glance
Go to Jobs Management > Jobs Templates and click Create Template.
A template has four sections: General, Assign Job to Services, Assign Job to Editor and Customize Information.
New templates start disabled. Turn on Enable this job to start creating jobs.
You must link at least one service.
A review step is optional. The Assign a Job Reviewer switch starts on for a new template. Turn it off if jobs don't need review.
Due dates and auto-creation times are measured from the order's shoot (appointment).
How do I create a job template?
Go to Jobs Management > Jobs Templates.
Click Create Template in the top right. If you don't have any templates yet, click Create Template in the middle of the page.
Fill in the four sections below.
Save the template.
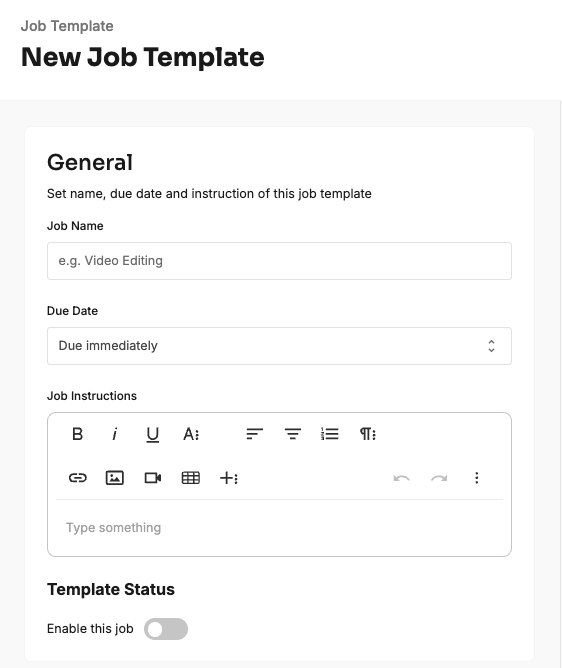
1. General
Set name, due date and instruction of this job template.
Job Name: what this job is called everywhere in Tonomo, for example Video Editing or Photo Editing.
Due Date: when jobs from this template are due, counted from the shoot. See What due date options are there? below.
Job Instructions: formatted instructions for whoever works on the job. They appear at the top of each job's details page.
Template Status > Enable this job: turn this on to let the template create jobs. It's off by default.
Set job auto creation time: appears once the template is enabled. It sets when Tonomo creates each job. See What auto-creation options are there? below.
2. Assign Job to Services
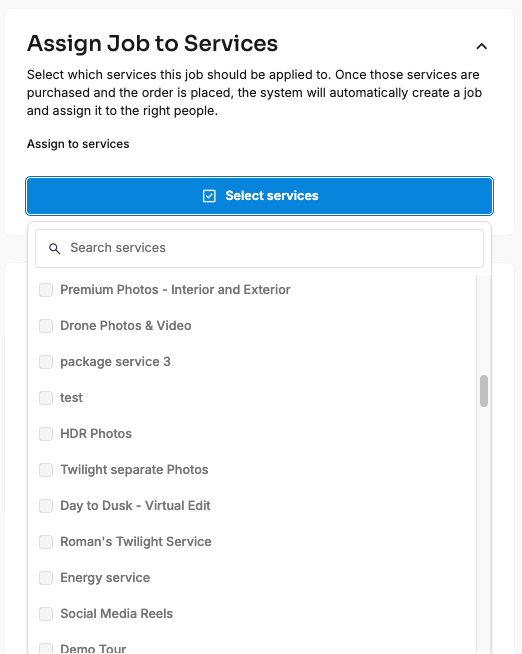
Select which services this job should be applied to. Once those services are purchased and the order is placed, the system will automatically create a job and assign it to the right people.
Search for and select each service that should create this job.
Select at least one.
Only the order's services that match the template are included in the job. If the service you need doesn't exist yet, click Create a new service.
3. Assign Job to Editor
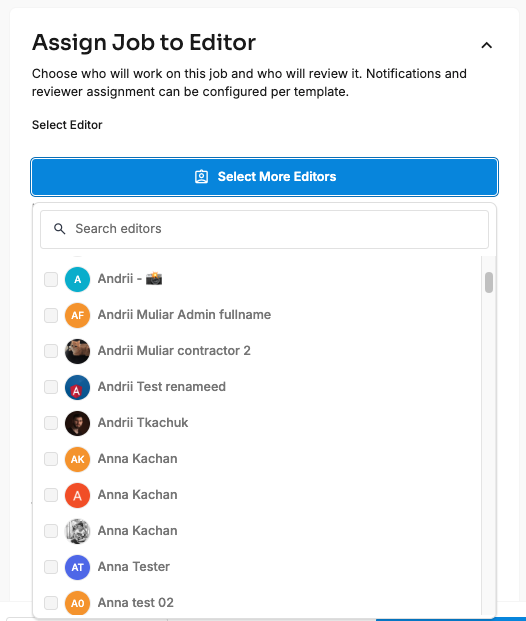
Choose who will work on this job and who will review it.
Select Editor: pick who works on jobs from this template. Click Select More Editors to add more. You can leave this empty and assign an editor on each job later.
Job Notification > Send notification to assignee when this job is created: on by default. When a job is created from this template, its editors get an in-app (bell) notification that links to the job. Turn it off to create jobs quietly. Editors and reviewers added later are always notified, whatever this setting is.
Job Reviewer > Assign a Job Reviewer: starts on for a new template. When it's on, choose at least one reviewer in Select Reviewer. They're notified when a job moves to Reviewing. Turn it off if jobs from this template don't need a review step.
Any team member can be an editor or a reviewer.
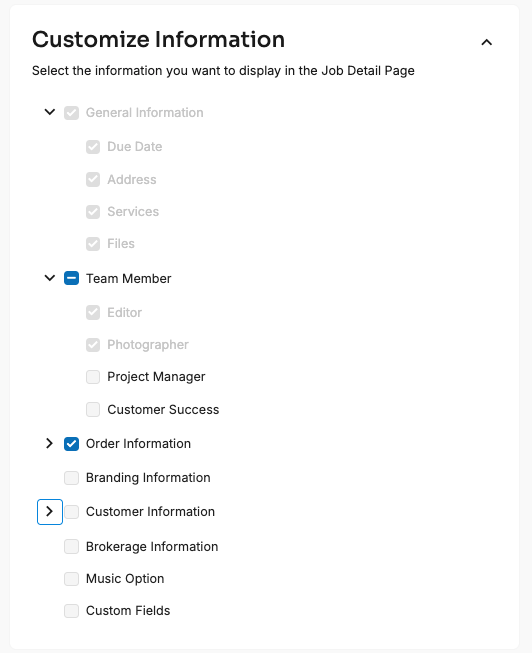
4. Customize Information
Select the information you want to display in the Job Detail Page.
Choose what editors and reviewers see on each job. Only what's needed shows, and client-private details can be kept out.
Group | What you can show |
|---|---|
General Information | Due Date, Address, Services, Files |
Team Member | Editor, Photographer, Project Manager, Customer Success |
Order Information | Order Link; Property Notes and Rooms (Feature Notes, Entry Notes, Floor Plan Notes; Bedroom, Bathroom and Half Baths) |
Branding Information | The customer's branding details |
Customer Information | Basic Information, Client Preferences, Client Notes |
Brokerage Information | The customer's brokerage |
Music Option | The music choice from booking |
Custom Fields | Answers to your booking flow's custom questions |
What due date options are there?
Option | Due date | Example |
|---|---|---|
Due immediately | The time of the shoot | Shoot Wed 10:00 AM, due Wed 10:00 AM |
X business days after appointment | X weekdays after the shoot, at the same time of day | 2 business days: shoot Thu 10:00 AM, due Mon 10:00 AM |
X business days after appointment, at Y time | X weekdays after the shoot, at the time you pick | 1 business day at 6:00 PM: shoot Fri, due Mon 6:00 PM |
X calendar days after appointment | X days after the shoot, weekends included, same time of day | 2 calendar days: shoot Thu 10:00 AM, due Sat 10:00 AM |
X calendar days after appointment, at Y time | X days after the shoot, at the time you pick | 1 calendar day at 6:00 PM: shoot Fri, due Sat 6:00 PM |
Business days skip Saturdays and Sundays. [CONFIRM: Are public holidays or your company holiday schedule also skipped?] The time picker starts at 6:00 PM.
You can change the due date on any individual job afterwards.
What auto-creation options are there?
Option | When the job is created |
|---|---|
Immediately after the appointment | The system creates the job as soon as the shoot happens on its scheduled day. |
X time after the appointment | A set time after the shoot, from 1 minute to 23 hours 59 minutes (the default is 1 hour) |
At a specific time on the appointment day | At the time you choose, on the day of the shoot (recommended) |
For the full rules, including rescheduled shoots, orders with several shoots, and cancellations, see When Does Tonomo Create a Job, and When Is It Due?
Example templates
Template | Linked services | Due date | Auto-created | Reviewer |
|---|---|---|---|---|
Photo Editing | Home Photos, Twilight Photos | 1 business day after, at 6:00 PM | 1 hour after the appointment | Project manager |
Video Editing | Highlight Video, Agent Intro/Outro | 3 business days after | 1 hour after the appointment | Project manager |
Floor Plans | 2D Layout | 1 business day after | At 6:00 PM on the appointment day | Off |
These are examples. Set yours up to match your workflow.
Frequently asked questions
Why isn't my new template creating jobs? New templates start disabled. Turn on Enable this job in the General section, or switch it on in the Activation column of the Job Templates list.
Can one service be linked to more than one template? Yes, for example, Home Photos creating both a Photo Editing job and a Virtual Staging job
What if I don't know who the editor will be? Leave Select Editor empty and assign someone on each job.
Can a template skip the review step? Yes. Turn off Assign a Job Reviewer.
Can I hide client notes from editors? Yes. Untick Client Notes under Customer Information in Customize Information.
Related articles